For many reasons climbing photography should be treated as a very specific genre of photography. The usual work tools of every photographer – specializing in landscape, portrait, sports, etc. – consist of a camera body, lenses and various accessories (like tripods, filers and so on) and all this equipment is transported in dedicated bags or backpacks. The market offers a wide range of various styles of photo bags, holsters, belts and backpacks, while producers intensely compete with each other by offering ingenious solutions to guarantee protection and comfortable transport of photographic equipment. However, when it comes to climbing photography – and probably mountain photography in general – DSLR and lenses constitute only a small part of a whole complex gear system that is necessary for taking pictures. Climbing gear (and obviously knowledge about how to use it) is as important as photographic equipment – without both elements we would be rarely able to take interesting shots. I have been taking climbing photos for almost as long as I have been climbing – that is for about 18 years. In this time, I have gained useful skills and gathered necessary equipment – both for taking photos and climbing.
At the beginning of my career, when I used to shoot almost exclusively in small crags frequented by sports climbers, transportation of equipment did not pose a significant problem. In the case of local crags approaches are usually short and easy, without demanding terrain – so I used to pack my climbing gear in a standard climbing bag/backpack, while my camera together with lenses went to a separate sling photo bag – initially Kata LightTri 317 (BTW it was a great model that I liked very much – it is a pity that they stopped making it), and later I replaced it on warranty with its Manfrotto equivalent. In easy terrain, on a forest path or in the crags, a photo bag was not a big problem and did not limit my basic mobility. However, later on I started thinking about more ambitious photographic projects – I wanted to start taking mountaineering photos, big wall and ice climbing.
I still remember my first experiences from shooting in the Tatra Mountains on a wall called Mnich and also my first winter photo session capturing mixed climbing in the Biała Woda Valley. Although it was relatively easy mountain terrain, it proved to me that my old system for transportation of photo equipment did not pass the exam. In mountain terrain, where climbing is sometimes required on approach, where you have to use your hands to keep balance and the route might be exposed – a photo bag in front of you limits your mobility, makes it impossible to see footholds, throws you off balance, and generally hampers your movements. The situation looked similar in winter, while approaching and descending on skis.
For this year I had two important photo/climbing trips planned – the first for ice climbing to Kandersteg (Switzerland) and the second to Taghia (Morocco). It was obvious for me that I have to buy a solution that would allow me to safely and comfortably transport my climbing and photo equipment in a demanding alpine terrain. I required a backpack with a volume of 40-50 litres, with a separate compartment for my DSLR and lenses plus additional space from the rest of my gear. Yet, it turned out that despite a wide offer it was very difficult to find a backpack that would meet all these criteria. Majority of photo backpacks are designed solely for transportation of cameras and lenses. Moreover, it appeared that among two-compartment bags there was a very limited choice. At the very beginning I crossed out two models from my list: Manfrotto Off Road Hiker 30 and Lowepro PhotoSport 300 AW – both models had too small spaces for photo and mountaineering gear. For a while I was considering PeakDesign Travel Line – I am a fan of quality and design philosophy of this brand. However, after having this backpack in my hands I also eliminated it from my list of potential purchases. Certainly it is a great proposal for conventional travelling. It would also easily cope with sport climbing, nevertheless, it seemed too bulky, protruding and limiting movements in difficult climbing terrain. What was left were three alternatives: FStop Tilopa 50l, Shimoda Explore and freshly launched onto the market Lowepro Powder BP 500 AW. Especially the latter one attracted my attention. Thanks to courtesy of Focus Nordic Poland – a company that distributes Lowpro in Poland – I received this backpack for testing during my trip to Moroccan gorge of Taghia.
TAGHIA
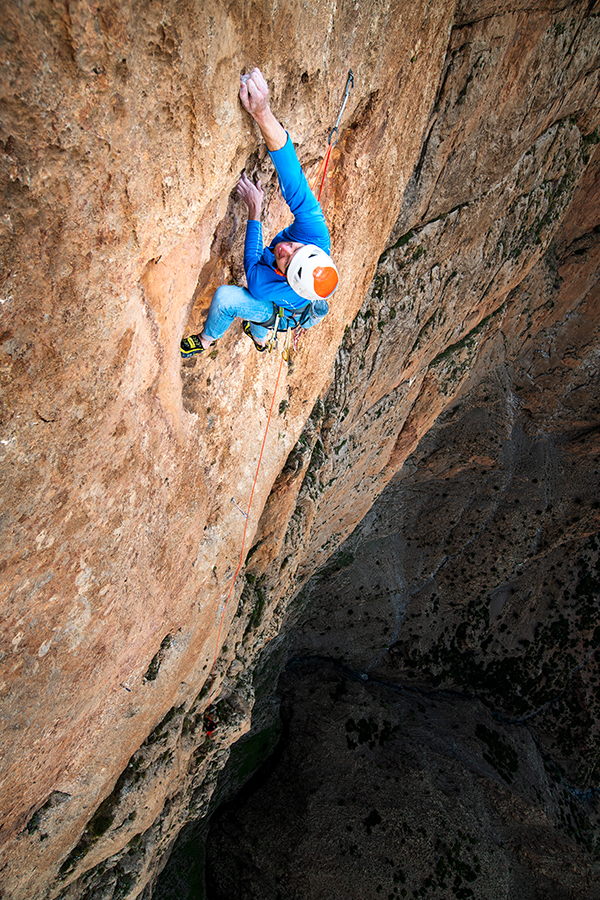
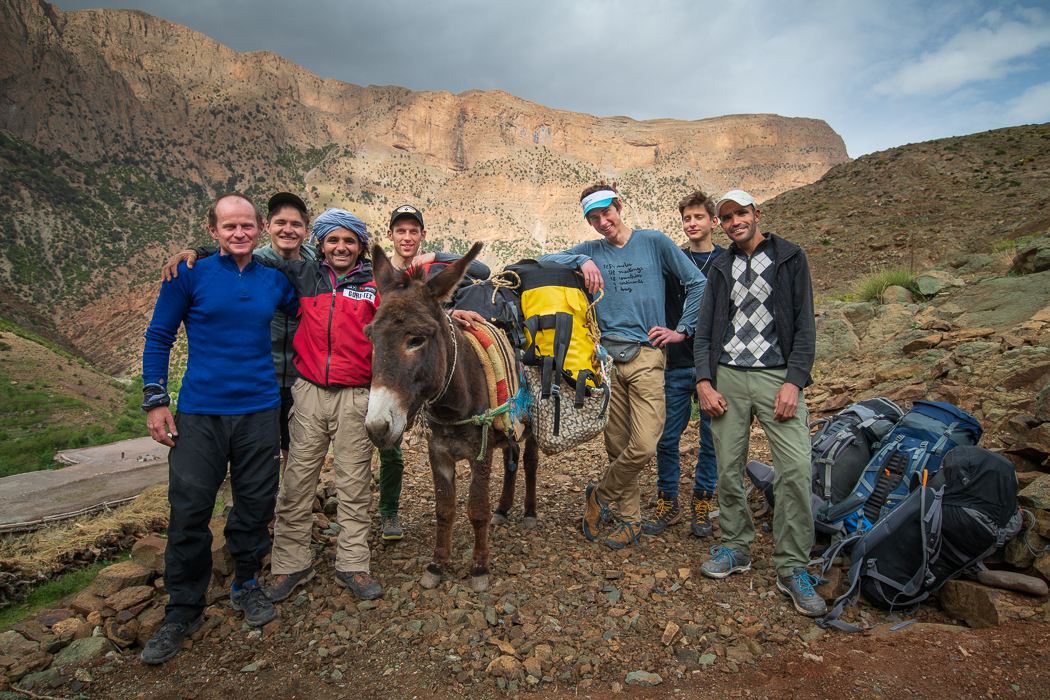
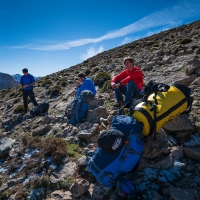
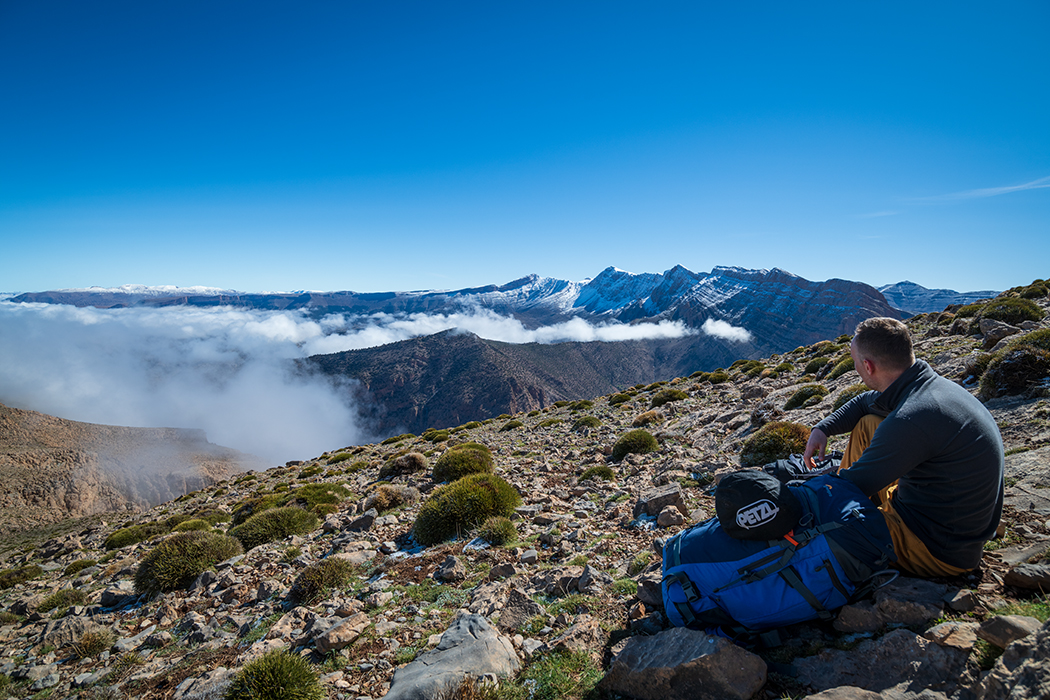
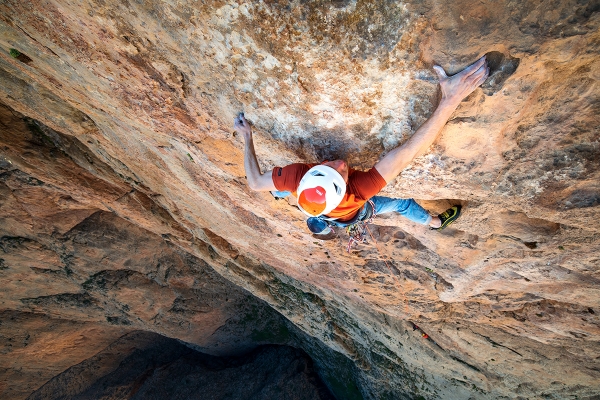
For this trip I joined a team of very talented climbers from Krakow – Michał Czech, Gabriel Korbiel and Michał “Misza” Brożyna. Our objective was to climb one of the most difficult and demanding routes in this area – Babel, 7c, 800 m, which was established in 2007 by Arnaud Petit, Titi Gentet, Nicolas Kalisz and Stéphanie Bodet. Our route led through the north-east face of Tagouijimt Massive located in the Taghia Gorge, the High Atlas. Even reaching the foot of the wall posed a big challenge – from the last settlement achievable by car you have to march for two hours. Most of our equipment was transported by the only reliable means of transport in this part of the world – on backs of donkeys. These conditions were a perfect, though challenging, ground for testing Lowepro Powder BP 500 AW.
FIRST IMPRESSIONS
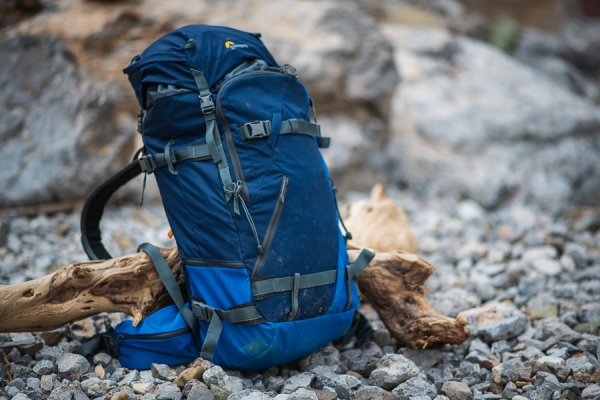
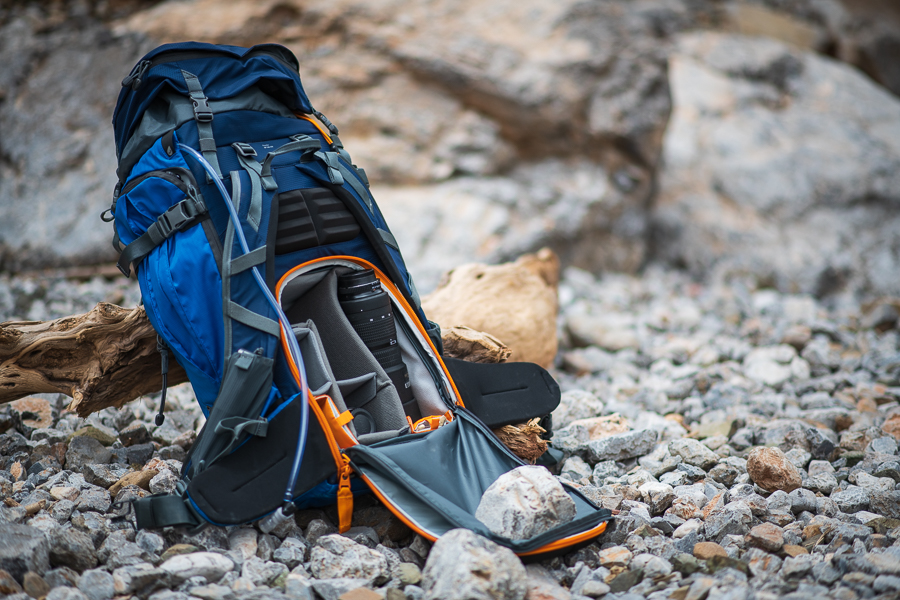
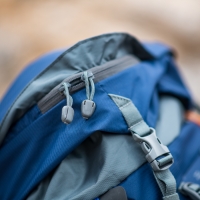
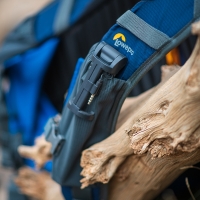
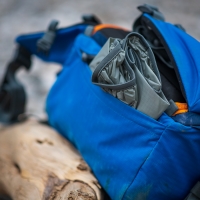
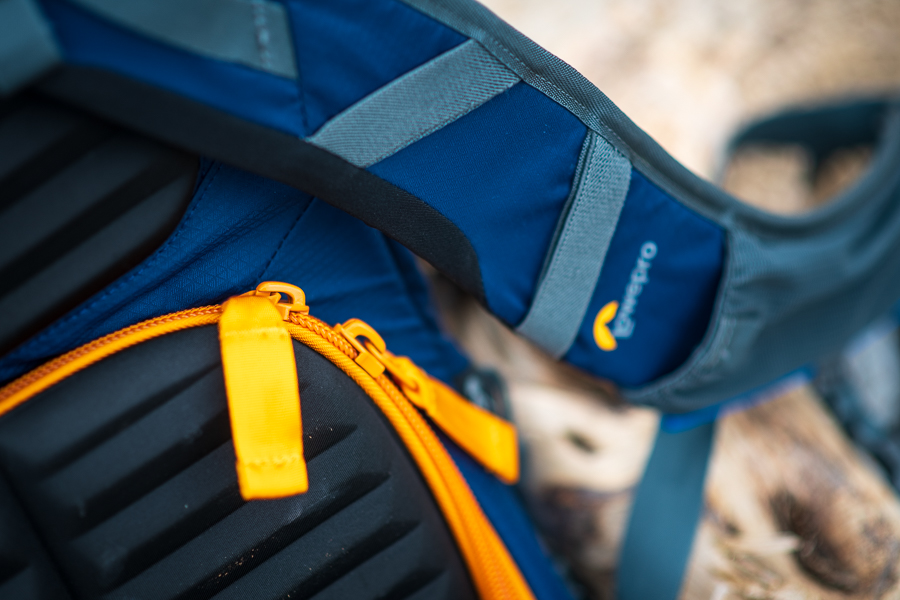
As I have already mentioned, this backpack drew my attention from the first glance and made a very positive initial impression. The producer offers two colour variants – orange/grey and navy blue/blue. I decided that the blue version was more appealing to me. The backpack is very light – only 2.4 kg including a padded compartment for cameras. The pack is made of light nylon fabrics 100D and 210D. The construction consists of two compartments – at the bottom of the backpack there is a removable photo bag accessible through the back panel of the pack, while on top of that sits a general gear compartment. Both spaces are separated by a panel attached with Velcro straps – this allows the removable photo bag to be pulled out also through the top of the backpack. The first thing that you notice is a big amount of additional pockets and straps – which makes it easy to compress the backpack and attach to it various external elements – e.g. poles, ice axes, skies, a snowboard or tripod. As I have already mentioned, it is possible to access the photo compartment from the top (but then it is only possible to pull the whole photo compartment out – there is no option to access photo gear directly from the top) or through the back panel. The whole photo bag is detachable and equipped with an additional zipped cover flap made of thin fabric. The bag is quite spacious and easily packs a large DSLR and up to 5 lenses. On top of the photo bag there is a grip which makes it easy to carry the bag in your hand. The backpack is equipped with a carrying system consisting of wide adjusted shoulder straps and a wide waistbelt. Attention to details and high quality finish are very noticeable. Zippers have easy-to-grip pull tabs, while strap buckles are made of high quality plastic. Materials used and construction of the backpack make a very good first impression.
PACKING – TEST NUMBER ONE
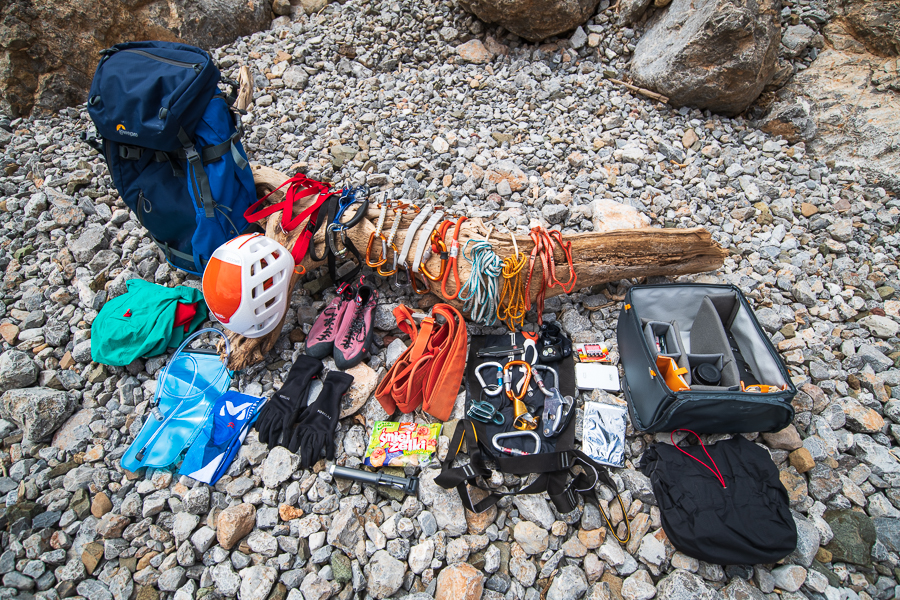
During years of photographing climbing, I have optimized my set of gear – both the one used for taking photos and the one used for belaying and climbing. As far as my photo gear is concerned, I opted for Nikon D850 with a grip and three lenses: AF-S Nikkor
18-35mm 1:3.5-4.5G, AF-S Nikkor 85mm 1.8G and AF Nikkor 80-200mm 1:2.8D. For this trip I decided not to take with me flashes predicting that in the big wall there will be neither time nor opportunity to use them anyway. I also packed a charger, memory cards, one polarization filter and two neutral grey filters, a Cokin holder, a remote release cord and some lens wipes. On the outside of the pack I attached a light tripod. Not only there were no problems with squeezing all my gear in – but actually there was quite a lot of free space left.
When you operate in the mountains, where you have to transport everything on your back, often through a challenging terrain, it might not be the best idea to take with you 5 lenses. When I climbed in the wall I took with me only DSLR, a wide angle lens and 80-200 zoom, because the crucial issue was to minimize the weight of my pack. So in this case the photo compartment turned out to be too spacious – I filled up the remaining space with power bars, gloves and some other odds and ends. I believe that it might be a good idea for the producer to introduce also smaller photo units – creating a whole system of photo bags compatible with the backpack, similar to the system used by F-Stop. Such a solution would offer much bigger flexibility allowing for ideal customization of the pack according to current needs of the user.
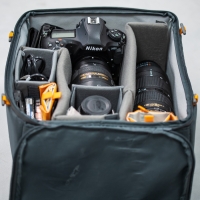
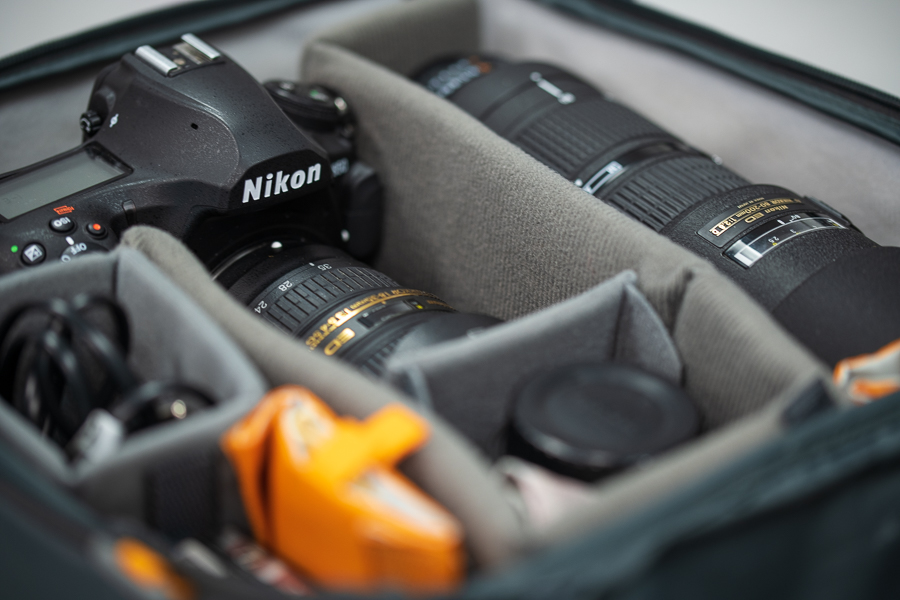
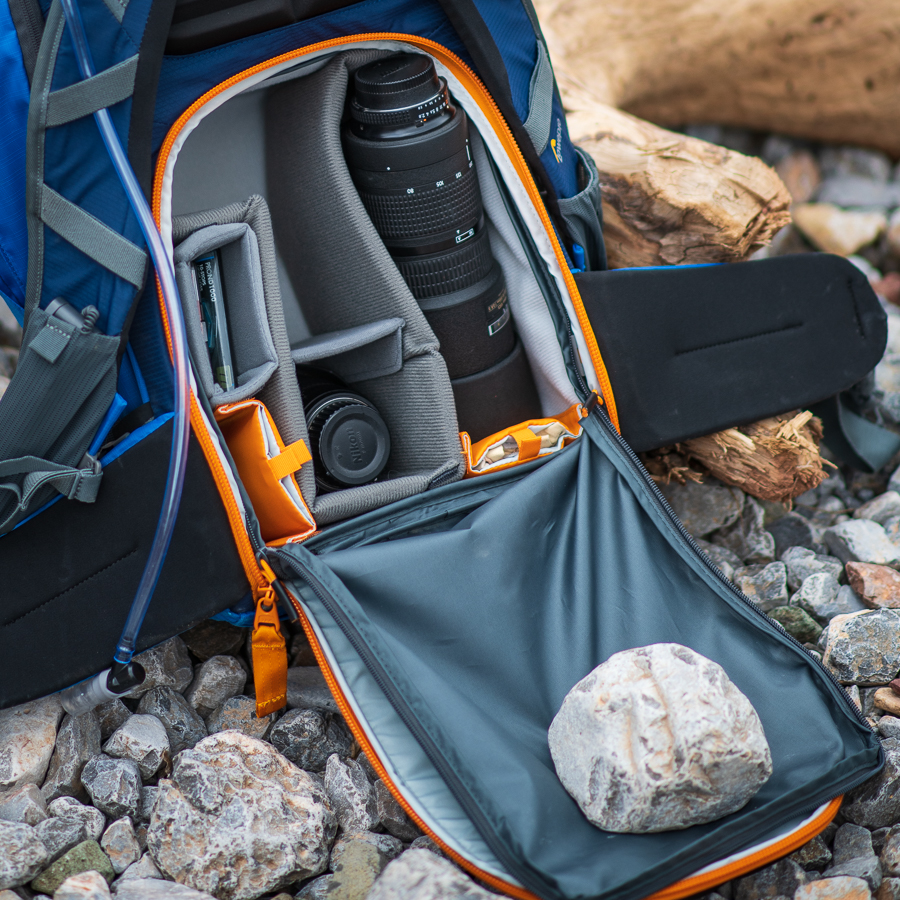
The photo bag is sizeable so without problems I managed to pack in a camera body with a grip and three lenses including a large bright telephoto lens. There was also enough space for all accessories – filters, charger, remote release, etc. The interior may be freely rearranged by means of padded walls attached with Velcro. In Photo 004 you may see also hooks for attaching the photo bag to the backpack – they allow you to stabilize the whole construction. The presented configuration includes the whole set of gear that I took with me to Morocco. However, I did not take with me most of the accessories for climbing in the wall – so there was a lot of free space left.
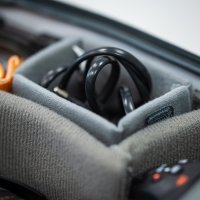
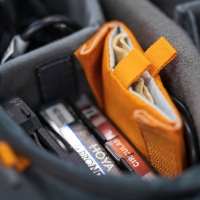
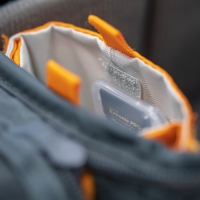
The interior is organized by means of two forms of padded removable walls: a) stiff separators filled with foam and covered with soft fabric – they constitute the frame of the construction b) soft nylon walls with zipped pockets – allowing storage of small objects like memory cards. Stiff frames with soft cover fabric guarantee good shock absorption and gear protection.
As far as climbing gear was concerned I usually packed: harness, Petzl Adjust lanyard, Petzl Ascension device with a leg loop, belay devices: Petzl GriGri and BlackDiamond Guide, HMS biners, some slings and 4 quickdraws, padded hanging seat (to avoid hanging only in my harness), helmet, rope, headlamp with spare batteries, pocket knife, powerbank for my mobile, selfie stick, 2-litre water reservoir, waterproof jacket, softshell, beanie, gloves, down jacket, NRC foil, food.
There was no problem with packing all this gear – I was really impressed by the volume and packability of the backpack. Additionally, the task was made much easier thanks to smart location of pockets – it was easy to pack, organize and, what is most important, to instantly and easily access the gear.

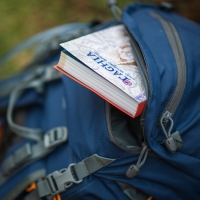
In the top lid there are two zipped pockets for small accessories. Organization of items is facilitated by additional internal mesh spacers. The spacious pockets easily pack a powerbank, batteries, headlamp, pocket knife and even a guide book. When taking pictures while hanging on a rope I often threw to the bigger pocket my lens to switch optics much faster. In the top pocket I usually kept also my cap or Buff scarf as protection against the sun and a woollen beanie and gloves in case of chilly moments.

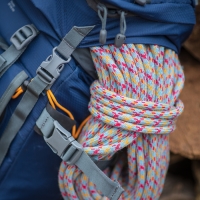
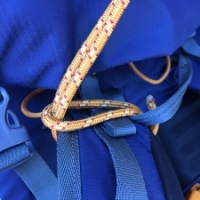
The top lid has a very practical attachment system – it is attached to the backpack with four adjustable straps with buckles. Such a solution makes it possible to detach it from any side (from front or from back). Moreover, it provides additional transport options and easy access to gear: I often attached my rope under the top lid. In order to stabilize it and secure against slipping out I additionally used side compression straps. This solution worked perfectly – the rope, despite its weight and the centre of gravity moved to the top of the pack, was very firmly strapped and did not get in my way. Such a solution seemed ideal for me, especially when compared with the competitive system from F-Stop, where I discovered to my surprise that the top lid is closed with a zipper which in my opinion severely limits its functionality.
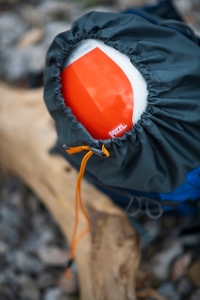
The volume might be expanded by spreading the drawcord top sleeve – according to producers the pack’s volume might be increased in this was up to 55 litres. I haven’t performed any tests to measure the volume, yet it is easily noticeable that the skirt allows you to pack a lot of additional small stuff or a single bigger item – my helmet seemed to fit in this space perfectly. Another advantage is a practical closure system with a drawcord.
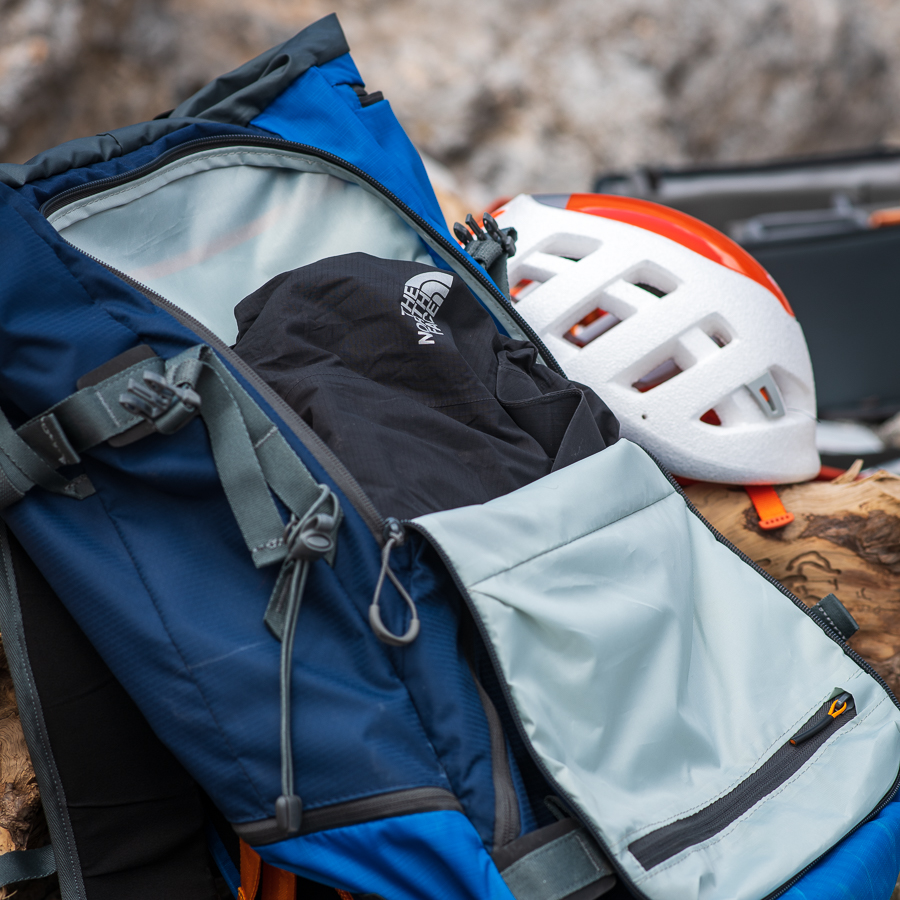
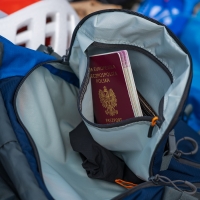
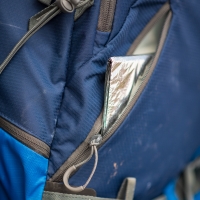
On the front of the backpack there is a huge flat zipped pocket – according to the producer this space is dedicated to avalanche gear. The pocket has two additional smaller pockets – one on the inside, and the other on the outside. In my case this spacious pocket was a perfect storing space for my Gore-Tex jacket and my softshell. It was a very functional solution because during approaches I often undressed down to my baselayer, but when stopping for a rest I could easily get out of my pack some warmer clothes. Similarly, in case of rain, it was really simple to get out my membrane. A small internal pocket was ideal for documents and wallet (though I wish it had a secure clip attachment for keys), while the external pocket was used by me for storing NRC foil.
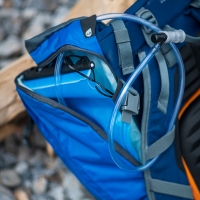
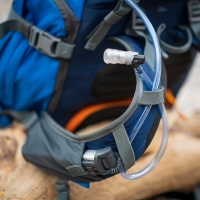
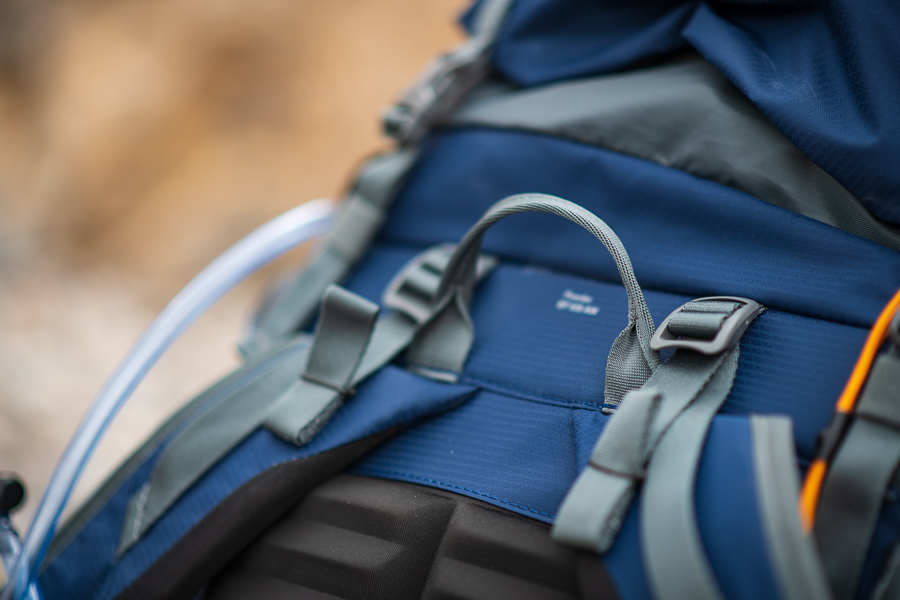
On the side of the backpack there is a hydration system pocket with a port for a drinking tube. It can hold a two litre water reservoir, which might be attached at the top with a small clip – unfortunately, I decided to buy my water reservoir in Decathlon and it turned out to be incompatible with the pack’s attachment system. It wasn’t a very serious issue since the full reservoir fitted well enough not to slide or change its position. The tube with a mouthpiece might be dragged through a special opening and attached with elastic loops on shoulder straps. Below the loops there are small mesh pockets that may store a mobile phone or some snacks – in my case I used these pockets for transporting a selfie stick and always having it at hand.

Small zipped pockets can be found also on the waistbelt – they will easily hold a powerbar, energy gel or a pack of tissues. When shooting on the march, I felt that I lacked some space to safely store my second smaller lens – Nikkor 85/1.8G. I guess that it might be a good idea to redesign slightly this section of the pack – instead of one of these tiny mesh pockets there should be some attachment for an extra lens case. Such a solution would greatly facilitate taking pictures on the approach – because currently it is necessary to take off the backpack every time you want to swap lenses – the only access to the photo gear compartment is through the opening in the back panel. There is another flat pocket at the bottom of the pack storing a protective cover against rain. It is worth noting that Lowepro designers ingeniously combined this protective layer with additional functionality – when hidden the cover acts as an extra shock absorbing layer securing the photo compartment.
APPROACH – TEST NUMBER TWO

After many years of carrying heavy backpacks in the crags and mountains I discovered a principle that undermines all known laws of physics. To my surprise I realized that a kilo is not a constant value but gets heavier with every covered kilometre. Now it was time to test how the backpack behaves in practice. The first stage of our trip was the airport – the backpack may be taken on board as a “WIZZ Priority” option (according to flight terms of Wizz Air, with which we flew to Morocco, it is a small suitcase with wheels and measurements 55x40x23 cm, maximum 10 kg) – this option required an additional fee but frankly speaking I can’t imagine sending my backpack with all my photo equipment to a cargo compartment. On the other hand, the fee was not too steep and it gave me peace of mind about my equipment worth several thousand euros. However, if we want to save some money or there’s no other option (as it happened during our return charter flight from Morocco), there is always an option of detaching the internal photo compartment and taking it on board as standard hand luggage – the photo bag has got its own lid and a handle. Remember to be careful with the bag as the lid is made of very light material. Still, the bag is very handy and this solution turned out to be quite convenient.
Generally, I kept my backpack close to me during the whole trip. Also when transporting our gear to Taghia on donkeys, I decided to carry my backpack by myself. The first few days in Taghia allowed me to get acquainted with the local topography and specifics of Berber trails and paths. Initially, I didn’t take with me too much climbing equipment, as it wasn’t required yet. My mates went to do some warm up climbs, so I packed only my DSRL with lenses, some water, food and extra clothes. During these short excursions I was able to test the carrying system with moderate loads. I also wanted to get familiar with mobility levels when moving in more demanding terrain with my pack on.
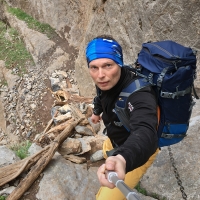
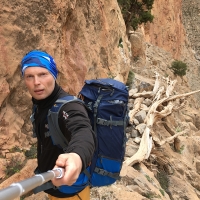
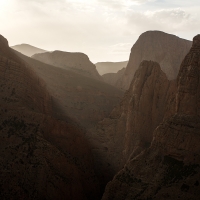
If somebody expects to find in Marocco well prepared trails from the Alps, they may be severely disappointed. Taghia is actually a very wild region, quiet recently “discovered” by climber for climbers. There is practically no tourist traffic or marked trails – climbers use traditional herding paths for goats in order to get to the foot of the wall. Paths are usually very narrow, often exposed and they often traverse a slope or a rock wall. Another characteristic element – and I must admit a very stressful one at the beginning – were so called “Berber bridges”. Those improvised bridges for goats were constructed usually with old logs in very airy spots. They spanned dizzying cliff drops – only occasionally protected with a rope or a chain. In such demanding terrain it is crucial to adjust the backpack perfectly so that you may move freely and safely. With moderate loads the waistbelt works really well and transfers the weight from shoulders to hips. I must admit that before I had had some doubts if the waistbelt wasn’t just a decorative element. I found the backpack to be very comfortable to carry – wide shoulder straps nicely adjusted to shoulders, there was no pressure or discomfort, while a very simple-to-operate adjustment system of the shoulder straps made it easy to change settings of the straps during the approach.
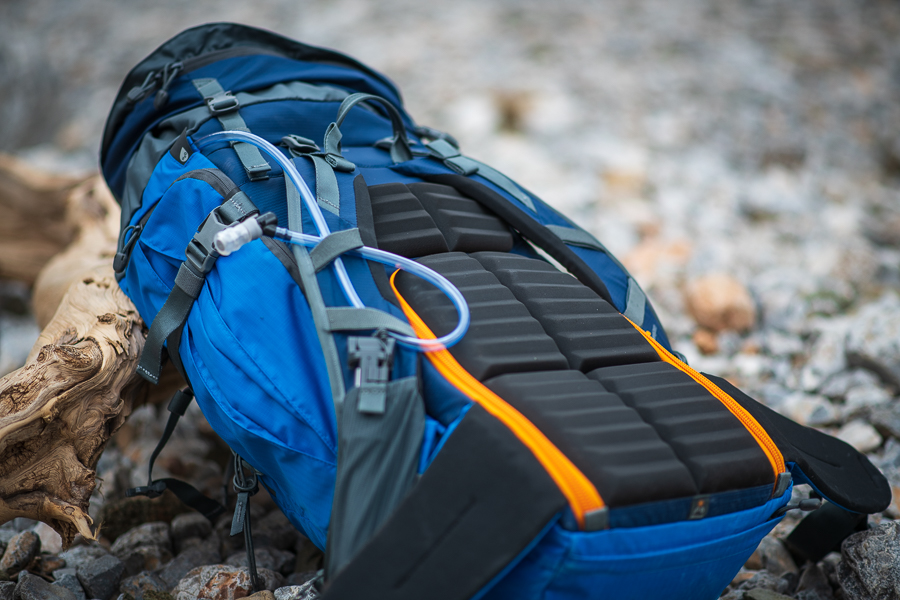
The back panel is padded with ribbed foam which improves ventilation – I didn’t feel that my back was wet during the march. In difficult terrain it is possible to additionally stabilize the backpack by closing the chest strap. And now I have to mention another point scored by the Lowepro designers – despite its significant volume and a massive lower compartment for photo gear, the backpack adheres well to the body, doesn’t swing to sides, doesn’t lean back or limit movements. Without any constraints it is possible to perform the full rotation of arms and the pack resting on your back does not make it any more difficult. I didn’t experience any difficulties or obstacles when climbing on more demanding sections of our approach route – though there were several spots where we had to use hands to keep our balance, use technical movements, jam our bodies against rocks or pull on fixed ropes. In exposed terrain the backpack does not throw you off balance due to its low centre of gravity that is located close to the body. Another big advantage is also its flat profile – the pack sticks out by only 22.5 cm, which is a much better result when compared to its competitors – F-Stop and Shimoda protrude by 28-30.5 cm.
When starting the proper big wall action, it was necessary to add to the backpack the full climbing gear required for shooting in the wall, plus water and food supplies. Our plan was to hike to the top of Tagouijimt and then rappel 800 metres down the wall. This tactics had several advantages – first of all, it allowed my team mates to pre-practice cruxes and difficult sections, but also it was a great opportunity for me to take some photos. Additionally, we wanted to transport into the wall extra supplies of water and food, and also sleeping bags and mats – initial reconnaissance, photo sessions and the final ascent were supposed to take two days with a bivouac on a ledge in the middle of the wall. It forced us to take with us more clothes. For all these reasons our backpacks were filled to their maximum capacity and approach turned out to be really hard work. However, also on this trying approach I must give Powder the highest possible rates. I managed to pack all the items required for the wall – external straps came handy in this case because my helmet didn’t fit inside, so I left it hanging outside. When scaling 900 metres of elevation, marching for 4 hours and carrying a massive load in difficult terrain, it is hard to talk about any sort of comfort when carrying your sack. However, once again I must emphasise that even in this extreme situation shoulder straps and waistbelt worked well and were relatively comfortable. My shoulders didn’t go numb, there were no grazes or painful spots. Yet, one disadvantage became apparent in the process. The hydration system is located in a pocket on the side of the backpack. These two litres of water weighed enough to tilt the whole pack to one side and cause some discomfort.
IN THE WALL – TEST NUMBER THREE
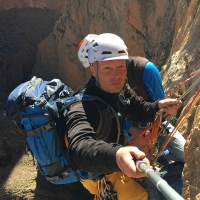
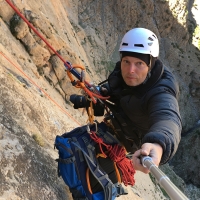
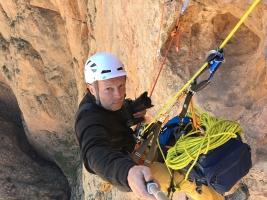
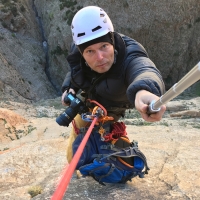
After locating the top anchor for abseiling, we had to rappel 18 pitches down the wall. It was time to get round to proper work – boys had to figure out beta for the most difficult pitches and I had to take photos. Both tasks were challenging. Our tactics looked like this: my mates abseiled a pitch and then top-roped cruxes, while I rappelled on a separate rope with my camera in order to get acquainted with sequences, find interesting angles and climbing moments. When both me and the climbers were ready, the boys abseiled to a lower anchor and then led the pitch from the bottom up, while I took photos from a chosen location. I rappelled with the backpack on, and only after I stabilized in my chosen spot and position, after pulling up ropes from below and clipping in my padded hanging seat, only then was I ready to take off the backpack and take out my DSRL. The backpack was usually clipped into an ascender – my padded seat was hanging on the same ascender as well – without my seat I would have soon lost blood circulation in my legs if hanging only in my climbing harness.
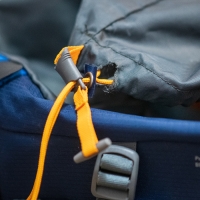
During shooting from a rope I would take the backpack off and clip it into an ascender with a quickdraw or a sling with a secure biner. I had some mixed feelings about the webbing handle loop for lifting the backpack – after examining it closely it seemed that it is attached with only a single stitching… Taking into consideration a big weight of the pack with gear, water, food and clothes, I felt a bit anxious (maybe this feeling was groundless, I didn’t know the precise construction of this element – perhaps it was double stitched somewhere inside) about attaching the pack only to this webbing loop so, just for peace of mind, I additionally clipped a secondary sling to one of the shoulder straps.
Thanks to clipping the pack in front of me, I had a relative ease (if in such conditions one may talk about any form of ease) and freedom of movements. There was no problem with accessing the photo compartment. All zippers of this pack are equipped with big comfortable pull tabs – and those on the lid of the photo compartment additionally have wide webbing tabs. This is an excellent feature – the grip is easy and confident, it is easy to operate zippers even in your gloves. Another big advantage is a double closure of the photo compartment – first there is the back panel and then there is an additional thin layer of the zipped lid of the photo compartment. First you have to completely unzip and open the stiff back panel. However, the internal soft lid of the photo compartment may be left partly closed – in this way you can secure the equipment against falling out in the upright position. In the case of climbing, it is a great advantage of using Powder. Yet, there is also a downside of this system – the photo bag is bigger than the back panel opening and consequently access to the photo unit zippers is uncomfortable since they are covered by the edges of the opening, especially in the top part. This causes huge difficulties in operating the zippers of the photo bag – it’s really hard to completely close the zippers. This so inconvenient that the problem appears not only in an upright position but also when the backpack is placed flat on the ground. You really have to put a lot of effort to completely close the lid of the photo unit. As a result I often left the internal lid partly open and only completely closed the back panel whose ease of access and zippers are absolutely flawless.
That was – I must admit – the most annoying drawback of this backpack and it got worse in difficult and uncomfortable positions. Perhaps if the producer decided to launch a system of photo units in different sizes (which is something that I would much appreciate) this disadvantage would probably be minimized. In the process of taking photos I often didn’t have time to hide my lens to the photo compartment, so I simply threw the smaller lens (18-35mm) into a pocket located on the top lid of the backpack – in order to have the lens always at hand.
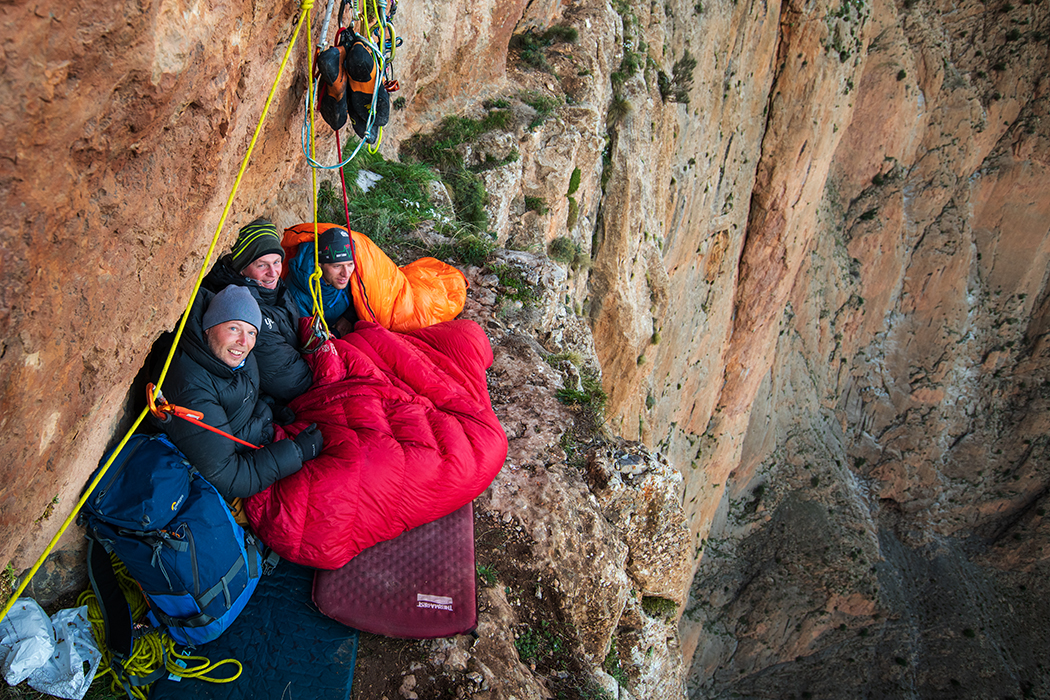
When using the backpack in such difficult conditions, it was unavoidable that it was harmed and abused by banging against rocks. However, the construction of the photo unit and the sturdy foam back panel secure its precious content very well. When bivouacking on a rocky ledge, I often leaned against the backpack or even used it as an improvised pillow – yet during the whole trip to Morocco no equipment inside was damaged.
DURABILITY AND WEAR
As you can see the backpack was used very intensely. It allowed me to learn its advantages and disadvantages really well and in demanding conditions. No doubt I tested not only the comfort and convenience of its use but also gave it a proper trial by fire as far as its sturdiness against wear and tear is concerned. According to Lowepro, this backpack was designed for mountaineering use so it should be expected that its construction and materials are highly resistant to mechanical abuse. And as it turned out, after two weeks of intensive exploitation, dragging it against rocks and boulders, I found not signs of abrasion, no tears or breaks. Apparently, the materials used are very tough despite their light weight. Though the backpack was used very intensely, two weeks are still a relatively short period of time, so I will be able to arrive at some more definite conclusions after a longer period of using the backpack. Although Powder is resistant to light rain, I would suggest using the rain cover in case of downpours. On one occasion I didn’t do it and the pack was slightly damp after a heavy rain – however, it wasn’t damp enough to threaten any of the photo gear inside. Only two elements were slightly damaged in the course of use: the interior side of the photo bag lid and the drawcord sleeve on top of the pack.
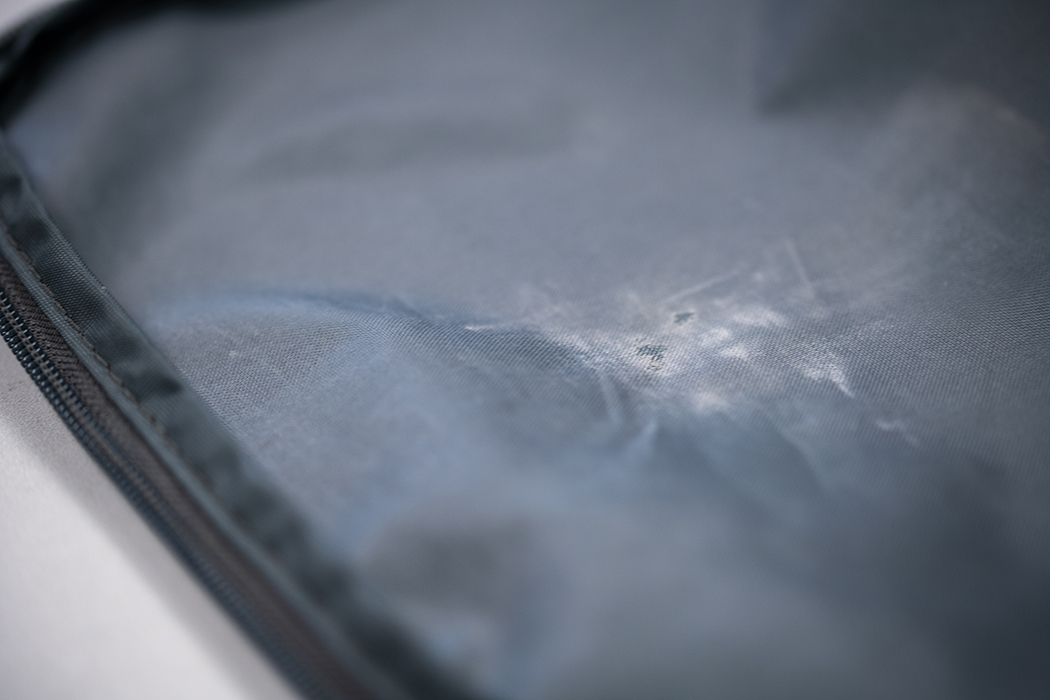
After two weeks of intensive usage there appeared clear signs of abrasion on the photo unit lid – especially in the spot where the DSLR flash mount touched the lid. Abraded was only the outside layer, the material itself was intact. On the last day of the trip, when pulling on the drawcord, one of securing metal rings was ripped out from the drawcord sleeve. I would suggest strengthening this element to the producers – in difficult mountain conditions there is often no time or patience to deal with the equipment in a delicate manner.
SUMMARY
Pros:
- functional and aesthetic construction, high quality craftsmanship, attention paid to details – very comfortable pull tabs on zippers, drawcord closure of the top sleeve, pockets with additional internal walls made of mesh, loops and mesh pockets on shoulder straps, convenient and reliable buckles made of quality materials, rain cover
- low weight and robust materials
- comfortable and adjusted carrying system – wide shoulder straps and waistbelt, thick, soft, ribbed back panel guarantees good ventilation
- stable on move, no constrains of mobility and body movements, especially in case of arms
- big amount of pockets and compartments allowing fast and easy access to packed things
- hydration system
- numerous options of external attachments for extra gear – poles, ice axes, skis, snowboard, helmet, a great solution for attaching a tripod in the form of an expanding pocket
- division into two compartments, big volume of both photo and standard gear compartments, an option of extending the volume by stretching the top sleeve and moving up the adjustable top lid
- the top lid is attached with four buckles so it can be opened on every side
- the photo compartment consists of a detachable photo box – stiff, secure, absorbing impacts, with plush finish and an external handle for carrying
- access to the photo compartment through the back panel, yet the photo box may be also removed through the top opening
- practically unlimited possibilities of different configurations of the photo box interior
- the soft lid of the photo box may be left only partly open to additionally secure photo gear against falling out when the backpack is in the upright position
Cons:
- lack of comfortable access to zippers of the photo bag lid through the back panel opening
- reservoir filled with water shifts weight distribution to one side (this inconvenience might not be noticeable if we attached a tripod to the opposite side – perhaps this concept inspired Lowepro designers)
- slightly too delicate finish of the drawcord on the top sleeve
A long list of advantages and only three disadvantages – this shows how well the backpack did during my trip to Morocco. I believe that the backpack completely satisfied my expectations and successfully coped with demanding conditions in which I had to operate and take pictures. My suggestion for Lowepro designers would be to consider an introduction of various sizes of photo units compatible with the backpack and also redesigning the waistbelt to allow attaching lens packs – that would make configuration of the pack much easier, adjusting it better to individual requirements and specific tasks. Access to lenses attached to the waistbelt would definitely facilitate shooting on the march – I guest that outdoor photographers would be very thrilled by such a possibility. The last issue that I would like to discuss is the price of the backpack, which may provoke mixed feeling among many. The backpack costs $340 – but is it worth this kind of money? In conditions in which I take photos and in my photographic discipline it is necessary to possess not only high technical skills but also proper equipment that would allow you to take photos in the first place. I suppose this backpack belongs to such a category – basically it makes it possible to transport and protect your photo gear which is very sensitive to damages in very extreme environment. Often we have to use gear worth several thousand euros. The more demanding the shooting conditions, the better protection of gear should be. As a popular among photographers saying goes: the best camera is the one that you have available with you and Powder allows you to take your photo gear with you and keep it safe in places where traditional solutions don’t work. We are dealing here with a highly specialised product, dedicated to working in very specific conditions. It is enough to say that the range of competitive offers includes only three other brands – the alternative options consist of pretty similar products at practically the same price level. In my personal opinion, this backpack is definitely worth recommending – I’m certain that it will be my trusted travel companion also on many future photographic/climbing projects.